No products in the cart.


Description
Intruduction:
Sooner or later, the Arduino starts to feel a little claustrophobic. Your sketches start running out of memory, so you need more RAM. You want to talk serial to another peripheral (like an RFID Module) AND watch the action in the Serial Monitor at the same time, so you need more UARTS. You want to use SPI and control a motor and read a few sensors, and pretty soon you’re out of pins, so you need more I/O pins. You’re logging data, and running out of 1k EEPROM fast, so a bit more EEPROM would sure be handy.
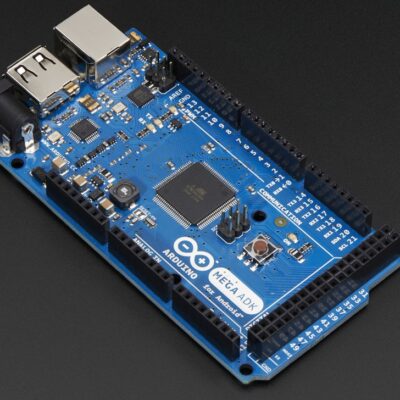
The obvious solution to this problem is an Arduino Mega 2560. Oh yeah, this thing is powerful! 54 pins! 4 UARTS! 8k RAM! You add it to your cart, and then realize it’s almost 200LE.
Now maybe you’re wondering, isn’t there anything in-between that might be a bit less cash? Indeed there is, it’s called the ATmega1284P and today I’m going to explore getting Arduino to run on it, on a breadboard.
Comparison
Here’s a quick breakdown of three chips… The 328P powers the Uno, the 2560P powers the Mega 2560, and the 1284P is the ‘Goldilocks’ chip, nestled right in the middle–EXCEPT for RAM. It has an abundance of RAM (16k!) which is important because RAM is typically the resource you run out of the quickest.
|
Feature |
328P |
1284P |
2560P |
|
Price |
$2.99 |
$4.66 |
$11.28 |
|
RAM |
2k |
16k |
8k |
|
Flash |
32k |
128k |
256k |
|
EEPROM |
1k |
4k |
4k |
|
UART |
1 |
2 |
4 |
|
IO Pins |
23 |
32 |
86 |
|
Interrupts |
2 |
3 |
8 |
|
Analog Inputs |
6 |
8 |
16 |
Background Reading
I’m going to build an Arduino ATmega1284P circuit on a breadboard, burn a bootloader, and upload sketches to it, all using the Arduino 1.0 IDE. This will all go better if you have done it once first with a regular ATmega328P. Doing these things on that chip is well-documented, and easy to get support on the forums if something goes wrong.
So first, read up and practice up on a 328P with help from these handy pages on the Arduino Wiki:
· Building Arduino on a Breadboard
There are three sections to the circuit show above. (Click on the image for a higher-resolution).
Power/Timing. I’m using a 16MHz crystal and 22pF caps for timing and a 0.1uF cap for power.
FTDI. I use a UGE Electronics CH340 breakout to program everything, so I’ve set this breadboard up with a connector for that mechanism.
Arduino ISP. To burn the boot loader using Arduino as ISP, six connections are needed from the Arduino. The from/to pins are indicated on the schematic.
For another view, check out this forum thread: Using the 1284p/664p (IDE, bread board and boot loaders)
Get the Software
The Arduino makes it easy to support a new ‘Hardware Platform’. The files you need are hosted on github, the Mighty 1284P Platform for Arduino.
WARNING this ONLY WORKS on Arduino 1.0. It would be possible to back-port to 0022, but seems unneeded now that 1.0 is nearing final release.
To install it…
1. Download the ZIP File
2. Unzip it a folder called ‘hardware’ off your sketches directory, e.g. /Users/maniacbug/Source/Arduino/hardware/mighty-1284p
3. Restart the IDE
4. Select Tools > Boards > Mighty 1284P
Burn a Bootloader
Once you have the Mighty 1284P platform set up, burning a bootloader is trivial. Follow the Arduino ISP instructions. You first burn the “Arduino ISP” sketch onto a regular Ardunio. Then change the “Boards” setting to the Mighty 1284P, hook up the ‘Arduino’ connections in the schematic above, choose “Tools > Programmer > Arduino as ISP” from the IDE, and then “Tools > Burn bootloader.”
To verify that it worked, move the LED to pin 1, and power cycle the breadboard. When the bootloader starts it flashes pin 1.
Upload a Sketch
Uploading a sketch is trivial now that the platform is set up and bootloader is in place. Try the ‘Blink’ example first, but change the LED pin to ‘1’ in the sketch. (Of course, move the LED back to the right pin, which is pin 2 on the MCU).
Understanding Pin Mappings
When you refer to a “pin” in the Arduino environment, e.g. “digitalWrite(13,HIGH)”, the system maps that pin onto a MCU pin. There is definitely no standard pin mapping for 1284P, many people have published their own. I chose a mapping that makes sense for the breadboard, where the digital pins start at MCU pin 1, and simply go around the chip counter-clockwise.
+—/—+
(D 0) PB0 1| |40 PA0 (AI 0 / D24)
(D 1) PB1 2| |39 PA1 (AI 1 / D25)
INT2 (D 2) PB2 3| |38 PA2 (AI 2 / D26)
PWM (D 3) PB3 4| |37 PA3 (AI 3 / D27)
PWM/SS (D 4) PB4 5| |36 PA4 (AI 4 / D28)
MOSI (D 5) PB5 6| |35 PA5 (AI 5 / D29)
PWM/MISO (D 6) PB6 7| |34 PA6 (AI 6 / D30)
PWM/SCK (D 7) PB7 8| |33 PA7 (AI 7 / D31)
RST 9| |32 AREF
VCC 10| |31 GND
GND 11| |30 AVCC
XTAL2 12| |29 PC7 (D 23)
XTAL1 13| |28 PC6 (D 22)
RX0 (D 8) PD0 14| |27 PC5 (D 21) TDI
TX0 (D 9) PD1 15| |26 PC4 (D 20) TDO
RX1/INT0 (D 10) PD2 16| |25 PC3 (D 19) TMS
TX1/INT1 (D 11) PD3 17| |24 PC2 (D 18) TCK
PWM (D 12) PD4 18| |23 PC1 (D 17) SDA
PWM (D 13) PD5 19| |22 PC0 (D 16) SCL
PWM (D 14) PD6 20| |21 PD7 (D 15) PWM
+——–+
Additional information
| Weight | 0.012 kg |
|---|
Brand
Chinese
Chinese

Chinese
You must be logged in to post a review.
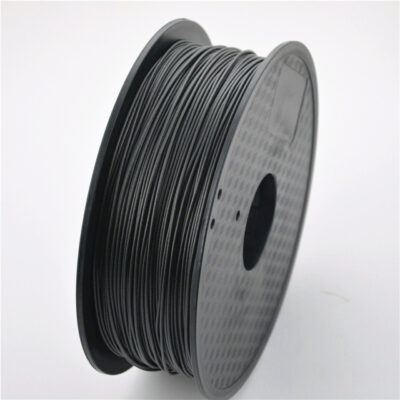
3D Printer Egypt Black Color Carbon fiber high strength 1.75mm/1Kg Reel
EGP 1,600.000 exc. vat Read more
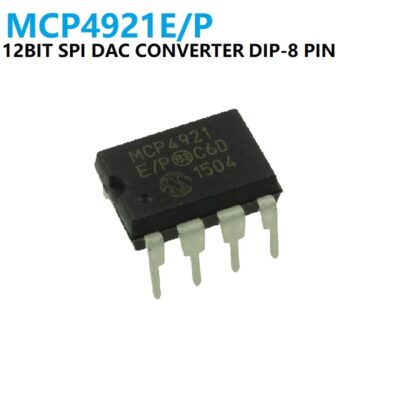
MCP4921E Digital to Analog Convertor 12BIT SPI DIP8
EGP 234.000 exc. vat Add to cart
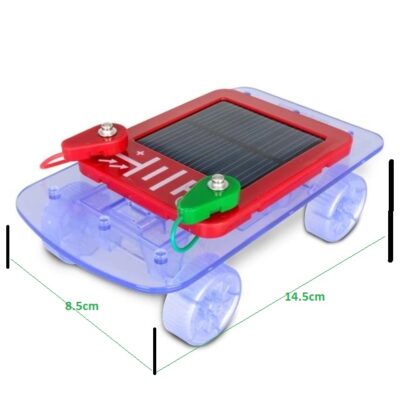
DIY Educational Solar Car Kit for primary school scientific experiments
EGP 200.000 exc. vat Read more
Refund Policy for UGE Electronics “Https://uge-one.com “
1. Returns and Refunds
Thank you for shopping at UGE Electronics “Https://uge-one.com “. If you are not entirely satisfied with your purchase, we’re here to help.
2. Eligibility for Refund
To be eligible for a refund, please make sure that:
– The item was purchased in the last 14 days.
– The item is in the original packaging.
– The item isn’t used or damaged.
3. How to Initiate a Refund
To initiate a refund, please contact our customer support at [[email protected]] or [01066552125]. Provide your order number and details about the product you would like to return.
4. Refund Processing Time
Once we receive your item, we will inspect it and notify you that we have received your returned item. We will immediately notify you on the status of your refund after inspecting the item.
If your return is approved, we will initiate a refund to your credit card (or original method of payment). You will receive the credit within a certain amount of days, depending on your card issuer’s policies.
5. Shipping Costs
Shipping costs are non-refundable. If you receive a refund, the cost of return shipping will be deducted from your refund.
6. Exchanges
If you wish to exchange an item, please contact our customer support. You will be responsible for the return shipping costs, and we will cover the shipping costs of the replacement item.
7. Damaged or Defective Items
If you received a damaged or defective product, please contact us immediately for assistance. We will work with you to resolve the issue promptly.
8. Contact Information
If you have any questions about our Refund Policy, please contact us at [[email protected]].
Important Note: This Return & Refund Policy is applied only for Orders invoiced VIA UGE Electronics, and regarding any Orders has been invoiced VIA any Other Vendor you can check the Return & Refund Policy of this Vendor VIA the Vendor Stroe Page, and it’s not our responsibility for any issue between you and the Vendor.
Product Enquiry
Related products
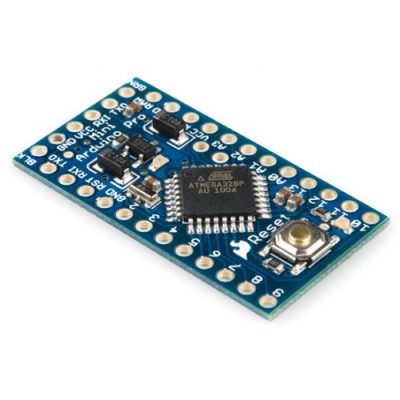
Arduino Pro Mini 328-5V
EGP 330.000 exc. vat Read more
Transparent Acrylic Shell Box For Arduino Mega2560 R3 Board
EGP 100.000 exc. vat Add to cart
Arduino LilyPad MEGA328 Main Board
EGP 120.000 exc. vat Read more
Reviews
There are no reviews yet.